How to Create an Email Template Without Coding
Step-by-step guide to designing professional, responsive email templates using a drag-and-drop builder. No HTML or CSS required — just follow these 8 steps.
David Diaz
Founder · April 1, 2026
You don’t need to know HTML, CSS, or any code to create professional email templates. Modern drag-and-drop builders let you design responsive, polished emails in minutes — no technical skills required.
In this guide, we’ll walk through the complete process of creating an email template without coding: from planning your content to exporting the final HTML ready to send.
This tutorial uses Flekki as the example builder because it’s free, requires no sign-up, and lets you follow along immediately. The principles apply to any visual email builder.
Before you start
A good email template starts with preparation, not design. Before opening any builder, get these elements ready:
- Your goal — Is this a newsletter, a promotional email, a product announcement, or a transactional message? The goal shapes the layout.
- Your content — Headlines, body text, images, and calls to action. Having this ready prevents blank-canvas paralysis.
- Your brand assets — Logo, brand colors (hex codes), and fonts. Consistent branding builds recognition across every email you send.
- Your sending platform — Know which ESP (Mailchimp, Brevo, SendGrid, etc.) you’ll use. This determines how you’ll import the final template.
Keep a simple brand guide document with your hex colors, logo files, and font names. You’ll reference it every time you build a new email, and it keeps your campaigns visually consistent.
Step 1: Open your email builder
Head to app.flekki.com — no account creation needed. You’ll land directly in the editor with a blank canvas ready to go.
If you prefer starting from a pre-designed layout, browse the template gallery and pick one close to your goal. Starting from a template is faster than building from scratch, especially for your first email.
See our comparison of the best free email template builders in 2026 to find the right tool for your workflow.
Step 2: Plan your layout structure
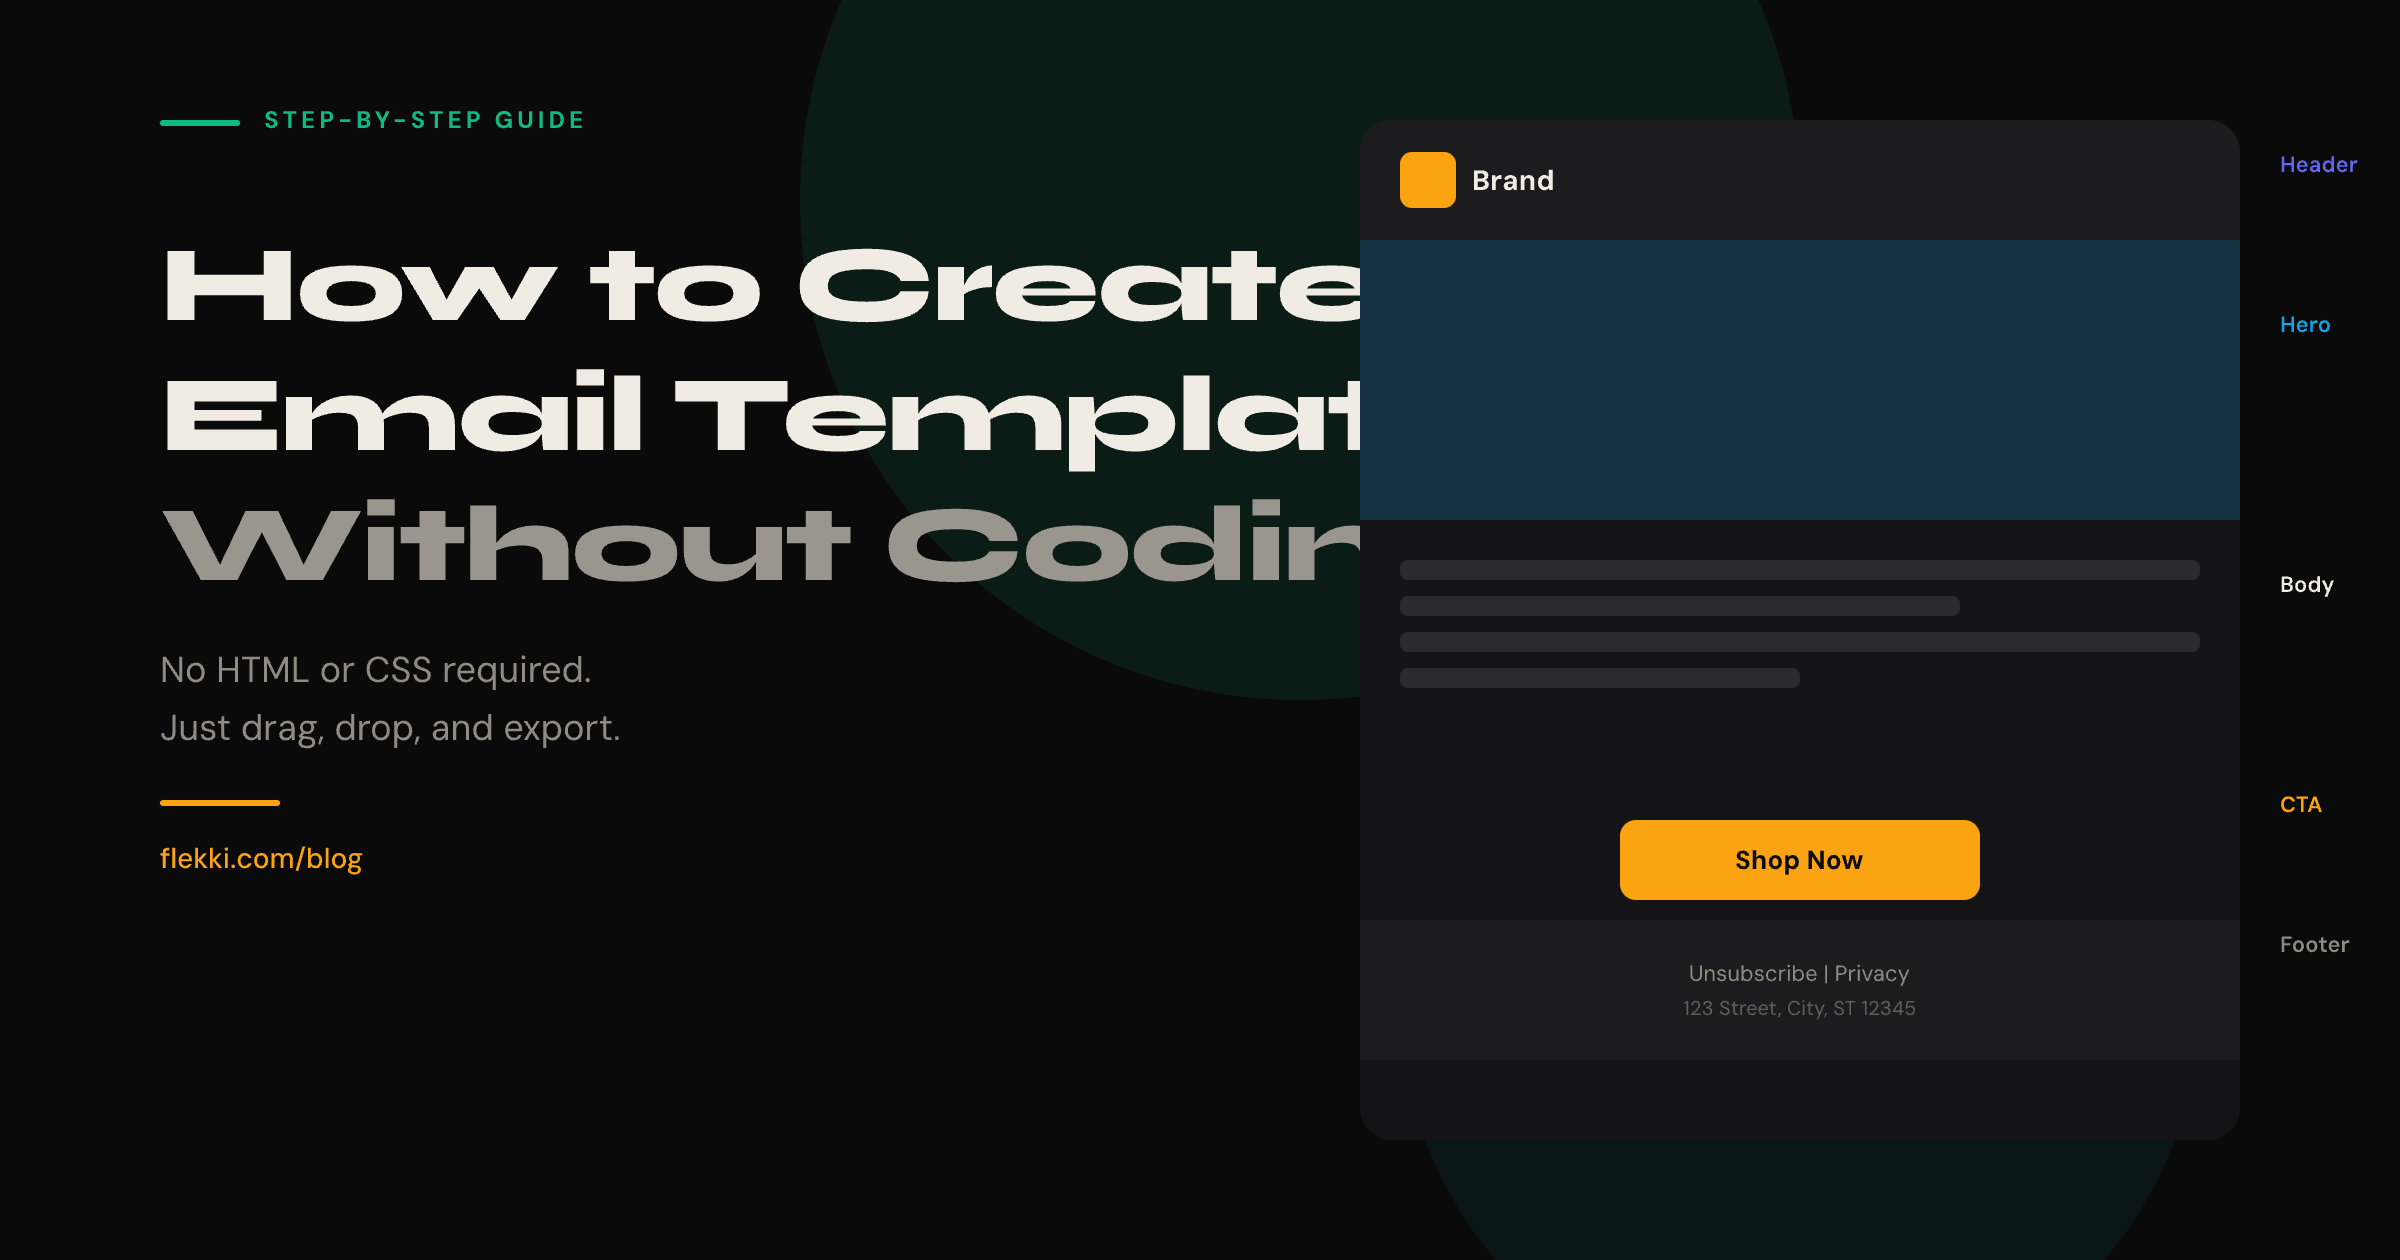
Every effective email follows a predictable structure. Readers scan emails top to bottom, so the layout should guide their eyes naturally:
- Header — Your logo and optional navigation link. Keep it simple and recognizable.
- Hero section — The main visual and headline. This is the first thing recipients see after opening. Make it count.
- Body content — Your message, broken into scannable sections. Use headings, short paragraphs, and images to maintain interest.
- Call to action — A clear, prominent button that tells the reader exactly what to do next.
- Footer — Legal requirements (unsubscribe link, physical address), social icons, and secondary links.
Don’t skip the footer. Most email regulations — including CAN-SPAM and GDPR — require an unsubscribe link and a physical mailing address in every marketing email. Missing these can get your emails blocked or your sending domain penalized.
Step 3: Build the structure with content blocks
In a drag-and-drop builder, you construct layouts by adding content blocks — pre-built components that you arrange vertically:
- Columns — Create side-by-side layouts (2-column, 3-column). These stack vertically on mobile automatically.
- Text blocks — For headings and paragraphs.
- Image blocks — For hero images, product photos, or illustrations.
- Button blocks — For your calls to action.
- Divider blocks — To create visual separation between sections.
- Spacer blocks — To control vertical spacing without invisible hacks.
Start by dragging in the blocks that match your planned layout from Step 2. Don’t worry about styling yet — get the structure right first.
Work top to bottom. Add your header block first, then hero, body sections, CTA, and footer. This mirrors how recipients will read the email and keeps you focused on the content flow.
Step 4: Add your content
With the structure in place, fill in your actual content:
Headlines should be concise and benefit-driven. Instead of “Our Monthly Update,” try “3 Features That Will Save You Hours This Month.” Specificity outperforms vagueness every time.
Body text should be scannable. Keep paragraphs to 2–3 sentences maximum. Use bold text to highlight key points. Most readers skim emails — make skimming productive.
Images should be optimized for email:
- Keep file sizes under 200KB per image to avoid slow loading.
- Use JPG for photographs and PNG for graphics with transparency.
- Always set alt text — some email clients block images by default, and alt text ensures your message still comes through.
Set alt text on every image. When images are blocked (common in Outlook and corporate email clients), alt text is the only thing recipients see. Write it as if the image won’t load: describe the message, not the visual. “Summer sale: 30% off all plans” beats “banner image.”
Step 5: Customize your brand styling
Now make the template yours. Most drag-and-drop builders let you customize:
- Colors — Set your brand’s primary color for buttons and headings. Use a neutral background (white or light gray) for the body to maximize readability.
- Fonts — Choose from web-safe fonts that render consistently across email clients. Arial, Helvetica, Georgia, and Verdana are reliable choices. Avoid decorative or custom fonts — they may not render in all clients.
- Button styles — Match your CTA buttons to your brand color. Make them large enough to tap easily on mobile (minimum 44×44 pixels).
- Spacing — Consistent padding between sections creates a polished, professional feel. Most builders use 16–24px padding as a default.
Email font rendering is limited. Unlike web pages, email clients don’t reliably support custom fonts loaded from Google Fonts or Adobe. Stick to web-safe font stacks for body text. You can use custom fonts for headings as a progressive enhancement — they’ll fall back to your specified web-safe alternative in clients that don’t support them.
Step 6: Optimize for mobile
Over 60% of emails are opened on mobile devices. If your template doesn’t look good on a phone, most of your audience will see a broken experience.
With a drag-and-drop builder, responsive design is handled largely for you — multi-column layouts stack into single columns on small screens automatically. But there are still things to check:
- Font sizes — Body text should be at least 14px on mobile. Headlines should be at least 22px. Anything smaller is hard to read without zooming.
- Button size — Tap targets should be at least 44×44 pixels. A button that’s too small frustrates mobile users.
- Image width — Images should scale to 100% width on mobile. Avoid fixed-width images that overflow the screen.
- Padding — Add enough padding on the sides (at least 16px) so content doesn’t touch the screen edge.
Use the mobile preview in your builder to check the layout before finalizing. Switch between desktop and mobile views to catch issues.
Step 7: Preview and test
Before sending any email campaign, preview your template across multiple contexts:
- Desktop preview — Check the layout at full width. Verify that columns, images, and spacing look correct.
- Mobile preview — Confirm that the single-column stack reads well and that buttons are easy to tap.
- Send a test email — Email the template to yourself and open it on your actual phone and desktop client. Previews are helpful, but real-device testing catches issues that previews miss.
- Check all links — Click every link and button in the test email. Broken links are one of the most common email mistakes.
Always send a test email to yourself before launching a campaign. Preview modes in builders don’t perfectly replicate how email clients render HTML. Gmail, Outlook, and Apple Mail each interpret code differently. A 2-minute test can prevent an embarrassing send to your entire list.
Step 8: Export your template
Once you’re satisfied with the design and testing, export the final HTML:
- HTML download — Save the file to your computer. This is the universal format that works with any email service provider.
- Copy to clipboard — Some builders let you copy the HTML directly for pasting into your ESP’s custom code editor.
- Direct integration — If your builder connects to your ESP (like Mailchimp, HubSpot, or SendGrid), you can push the template directly without manual export.
After exporting, import the HTML into your email service provider and set up your campaign as usual — add your recipient list, subject line, preheader text, and schedule the send.
Email template best practices
Beyond the step-by-step process, keep these principles in mind for every template you create:
Keep the content width at 600 pixels. This is the standard that ensures compatibility across email clients and devices. Wider emails risk horizontal scrolling or clipping in Outlook and Gmail.
Use a single-column layout for simple messages. Multi-column layouts look great on desktop but add complexity. If your email has one clear message and one CTA, a single column is the most effective structure.
Limit your email to one primary CTA. Multiple competing buttons create decision paralysis. If you need secondary actions, style them as text links rather than buttons.
Compress images before uploading. Large images slow loading times, especially on mobile connections. Use tools like TinyPNG or Squoosh to compress images to under 200KB without visible quality loss.
Test in dark mode. A growing majority of users enable dark mode on their devices. Check that your colors, images, and text remain readable when the background is inverted. Use transparent PNGs for logos and avoid pure white backgrounds that become jarring in dark mode.
Common mistakes to avoid
These mistakes account for the majority of email rendering issues. Avoiding them will put you ahead of most senders.
- Using images as your entire email. If images are blocked (common in corporate environments), recipients see nothing. Always include live text with your key message.
- Forgetting the preheader text. The preheader is the preview text that appears next to the subject line in the inbox. If you don’t set it, email clients will pull the first text from your email — which might be “View in browser” or your header navigation.
- Designing only for desktop. Building on a large screen makes it easy to forget the mobile experience. Check mobile preview at every stage, not just at the end.
- Sending without testing. Every email client renders HTML differently. What looks perfect in your builder’s preview may break in Outlook or Gmail. Test before every campaign.
- Ignoring file size. The total weight of your email (HTML + images) should stay under 100KB of HTML and 800KB total. Heavier emails load slowly and are more likely to be clipped by Gmail.
Frequently asked questions
Can I really create a professional email without coding?
Yes. Drag-and-drop email builders generate the HTML and CSS for you. The output is the same production-quality code that a developer would write manually — you just design it visually instead.
What’s the best size for an email template?
The standard content width is 600 pixels. For body text, use 14–16px font size. Keep the total email file size under 100KB of HTML.
How do I make my email template responsive?
Most drag-and-drop builders handle responsive design automatically. Multi-column layouts stack into single columns on mobile, and images scale to fit the screen. Check the mobile preview in your builder to verify.
Do I need a paid tool to create email templates?
No. Flekki is completely free with no export limits and no sign-up. You can create, design, and export unlimited email templates at no cost.
How do I import my template into Mailchimp/SendGrid/etc.?
Export the HTML file from your builder, then use your ESP’s “Import HTML” or “Custom Code” option. Most platforms have a dedicated import flow in their campaign editor. Paste the HTML code or upload the file directly.